Solo Camping for Beginners: Your Complete First Adventure Guide
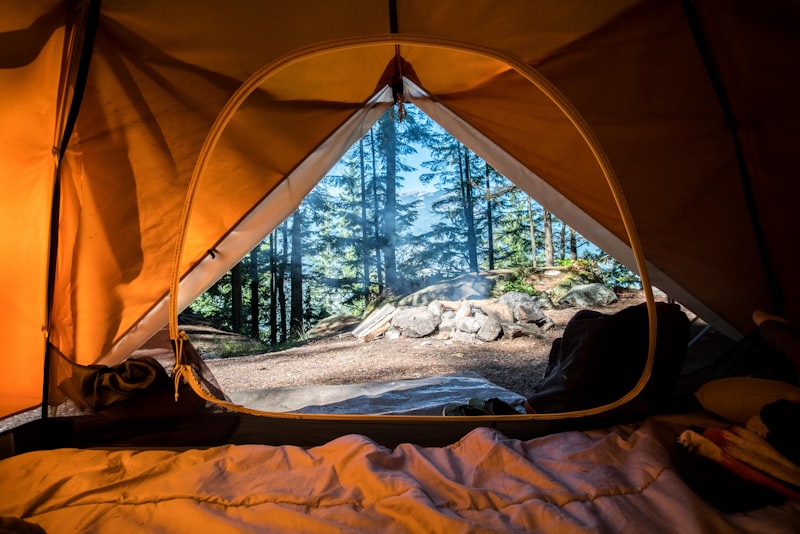
Image source: Unsplash (Free to use)
Solo Camping for Beginners: Your Complete First Adventure Guide
Let’s be real—solo camping sounds intimidating when you’ve never done it. Last spring, I convinced my roommate, Jake, to try it with me. We’d both slept in tents exactly once (on a school field trip in 8th grade), and our idea of “outdoor cooking” was microwaving s’mores kits in the dorm. We spent a week panicking over gear lists, bought a $200 tent we didn’t know how to pitch, and forgot the most basic thing: a can opener. By the time we left our campsite two days later, we were covered in dirt, our coffee was burnt, and we’d laughed so hard we cried when Jake tripped over a root and spilled our trail mix all over the tent floor. But here’s the thing: we didn’t just survive. We had the best weekend of our year.
If you’re a first-time solo camper (no guides, no group trips, just you and the great outdoors), this guide is for you. It’s full of the messy, real-world lessons we learned—no jargon, no over-the-top gear flexing, just simple, actionable tips to make your first trip smooth, safe, and fun. This isn’t about being a “perfect” camper; it’s about getting outside, embracing the chaos, and making memories that stick.
Pre-Trip Planning: Lay the Groundwork Without Overcomplicating It
The biggest mistake beginners make is either overplanning to the point of stress or winging it entirely. Find a middle ground—cover the basics, but leave room for spontaneity.
Pick the Right Campsite (Start Small, Stay Comfortable)
Skip remote backcountry sites for your first solo trip. Established campgrounds with basic amenities (restrooms, potable water, trash bins) are designed for people like us—newbies who don’t know how to filter water or start a fire with wet wood. Look for these key features:
- Beginner-friendly sites: Most national and state parks have designated “family” or “solo” sites that are flat, well-maintained, and not too far from the parking lot. We chose a site 50 feet from our car, which meant we didn’t have to hike with our heavy packs (a lifesaver when we realized we’d packed 10 pounds of extra clothes).
- Privacy without isolation: Sites with trees or rocks between plots feel cozy, not crowded. Avoid wide-open group sites—they’re noisy and impersonal, and you’ll feel self-conscious if you’re still struggling to pitch your tent at sunset.
- Avoid low-lying areas: We almost booked a site in a slight depression, but a ranger warned us it would flood if it rained. Instead, we picked a spot on a gentle slope, and stayed dry when a surprise afternoon shower rolled through.
Book Ahead (And Read the Fine Print)
Popular campgrounds fill up fast—especially weekends and holiday weekends. Use apps like ReserveAmerica (for U.S. parks) or Pitchup (for international sites) to book 2–4 weeks in advance. When you book, double-check:
- Is there a fee? Most established sites cost $15–$30 per night, which is way cheaper than a hotel and worth it for the amenities.
- Are campfires allowed? Some areas ban fires in dry seasons, so don’t show up with a bag of firewood just to be disappointed.
- Do you need a permit? National parks often require a separate camping permit (not just an entry fee)—we almost forgot ours and had to rush to the ranger station before check-in.
Split the Prep Work (No One Should Carry the Load Alone)
If you’re camping with a friend (which I highly recommend for your first trip), split tasks to avoid burnout. Jake handled booking the site and researching nearby hikes, while I planned meals and made the packing list. We had a quick 10-minute call the night before to go over final details, which meant we didn’t both pack a tent (yes, that’s a mistake we almost made).
Gear Essentials: Prioritize “Need” Over “Nice”
Beginners love to overbuy gear—we’ve all seen those viral TikTok videos with $1,000 camping setups. But you don’t need fancy gadgets to have a good trip. Stick to these basics, and skip the rest.
The Non-Negotiables (You’ll Regret Leaving These Behind)
- Tent: A 1 or 2-person 3-season tent is perfect for most trips (spring through fall). Look for freestanding models—they don’t require stakes to stay up, which is great for rocky ground. We bought a budget $120 tent, and it held up through rain and wind just fine.
- Sleeping pad: Inflatable self-inflating pads are more comfortable than foam, and they insulate you from the cold ground. We used $30 pads each, and woke up without the back pain we’d feared.
- Sleeping bag: A 3-season bag with a temperature rating of 5–10°C (41–50°F) works for most mild weather. Avoid ultra-heavy winter bags—they’re bulky and unnecessary unless you’re camping in snow.
- Headlamp: This is way more useful than a flashlight. You can wear it while pitching your tent, cooking, or walking to the restroom at night. Bring extra batteries—we used ours for 6 hours straight, and the batteries died right when we needed them most.
- Water bottle + purification method: Bring a 1L reusable water bottle, and either a portable filter (we used a $20 Sawyer Mini) or purification tablets. Even if the campground has potable water, you’ll need to filter water if you go hiking.
Gear to Share (Lighten Your Load)
If you’re camping with a friend, split bulky items to avoid carrying too much weight:
- Cooking gear: A small 1-burner propane stove, one pot, one pan, and a set of reusable utensils. We shared a $40 stove, and it heated water for coffee and cooked pasta in minutes.
- Cooler: A small soft-sided cooler for perishables like eggs, cheese, and yogurt. We packed ice packs, and our food stayed cold for 2 days.
- Camp chairs: Nice to have, but not essential. We brought one cheap folding chair and took turns sitting in it—saving space in our packs was worth the minor inconvenience.
Skip These “Essentials” (Trust Us)
- Fancy portable grills: A small stove works for most meals, and campfires (if allowed) are better for s’mores anyway.
- Extra clothes: We packed 4 shirts each and only wore 2—you’ll get dirty, but layers are more efficient than multiple bulky items.
- Portable speakers: The best part of solo camping is the quiet—listen to birds, wind, and your own thoughts instead of music. We brought ours and never turned it on.
Setting Up Camp: Take It Slow, Laugh at the Mistakes
Pitching a tent for the first time will feel chaotic. Jake and I spent 20 minutes staring at the poles, convinced we’d been sent the wrong parts, before realizing we’d just flipped the tent body upside down. That’s okay—no one expects you to be a pro on day one.
Arrive Before Sunset
This is the most important tip for beginners. Set up camp with at least 1–2 hours of daylight left. Fumbling with tent poles in the dark is a recipe for frustration (we almost gave up and slept in the car our first night). Here’s the step-by-step we wish we’d followed:
- Clear the site: Rake away rocks, sticks, and pine needles from the tent area. No one wants a rock digging into their back all night.
- Lay down the footprint: This protects the tent floor from moisture and sharp objects. Make sure it’s smaller than the tent so rain doesn’t pool under it.
- Pitch the tent: Follow the instructions (yes, actually read them!). Have one person hold the tent steady while the other inserts the poles.
- Stake it down only if needed: On calm nights, you can skip stakes. If it’s windy, use the included stakes to keep the tent from blowing away.
- Set up your “kitchen”: Place the stove on a flat, dry surface away from the tent (fire hazard!). Unpack food in a shaded spot to keep it cool.
Keep Camp Clean (Avoid Critters!)
Animals like squirrels, raccoons, and even bears are attracted to food smells. Never leave food in your tent—store it in a bear bag (hang it from a tree 10+ feet high) or in your car (if the campground allows). We made the mistake of leaving a granola bar on our picnic table one night, and woke up to a raccoon rummaging through our gear (goodbye, our favorite snack).
Food & Hydration: Simple Meals That Taste Great After a Long Day
You don’t need to be a campfire chef to eat well while camping. Stick to meals that are easy to prepare, require minimal cleanup, and taste good even if you burn them a little.
Our Go-To Beginner Camping Menu
- Breakfast: Oatmeal with dried fruit and nuts (cook it on the stove in 5 minutes) + instant coffee. We added peanut butter for extra protein, which kept us full until lunch.
- Lunch: Sandwiches (peanut butter and jelly, canned tuna, or cheese) + fresh fruit (apples and bananas hold up well in a cooler) + a bag of chips. No cooking required—perfect for hiking days.
- Dinner: Pasta with jarred sauce + canned chicken. Heat the sauce, cook the pasta, and mix—done in 15 minutes. We added garlic powder and dried herbs for extra flavor, and it tasted better than any restaurant pasta.
- Dessert: S’mores (graham crackers, chocolate, marshmallows). Roast marshmallows over the campfire (if allowed) until they’re golden brown (or burnt—we won’t judge).
Pro Tips for Easy Camping Meals
- Pre-chop veggies and marinate meat at home. We forgot this and spent 10 minutes hacking carrots with a pocket knife (not ideal).
- Bring reusable containers for leftovers. We stored our leftover pasta in a mason jar, and it stayed fresh for lunch the next day.
- Stay hydrated! Drink 2–3 liters of water per day, even if you don’t feel thirsty. We brought a 5L collapsible water jug and filled it up at the campground’s water spigot every morning.
Safety Tips: Stay Safe Without Stress
Safety is important, but it doesn’t have to be scary. Cover these basics, and you’ll be prepared for most situations.
Pack a Minimal First-Aid Kit
You don’t need a hospital-on-a-backpack—just the essentials:
- Bandages (various sizes), antiseptic wipes, and pain relievers (ibuprofen works for headaches and sore muscles).
- Tweezers (for splinters or ticks—we used ours to remove a tick from Jake’s ankle).
- A small tube of antibiotic ointment and a CPR mask (better safe than sorry).
Stay Connected (But Disconnect Too)
- Bring a portable phone charger. We used a $20 solar charger, and it kept our phones alive for the entire weekend.
- Download offline maps. Cell service is spotty in most campgrounds, so use apps like Gaia GPS or Google Maps Offline to avoid getting lost on hikes.
- Tell someone your plans. Text a friend or family member your campground name, site number, and return date. We forgot this, and our parents panicked when we didn’t check in (oops).
Know the Weather (And Plan for It)
Check the forecast 3 days before your trip, and pack for rain even if it says “sunny.” We brought waterproof jackets “just in case,” and ended up using them during a surprise afternoon shower. Avoid camping in thunderstorms—if you hear thunder, get in your car (not the tent!) until it passes.
Embrace the Chaos: It’s Okay to Be Imperfect
Our first solo camping trip was full of mistakes: we burned the pasta, forgot the can opener (we used a knife to open the tuna can), and Jake’s sleeping bag slipped off his pad in the middle of the night. But those messy moments are the ones we still laugh about today.
Don’t compare your trip to the perfect Instagram photos you see online. Real camping is dirty, a little chaotic, and sometimes uncomfortable—but that’s where the magic happens. Spend an afternoon sitting by the fire, reading a book, or just chatting with your friend. Skip the long hike if you’re tired. Eat burnt s’mores and drink too much coffee. The point is to be present, not to “do it all.”
Final Thoughts: You’ve Got This
Solo camping for beginners isn’t about being an expert outdoorsman—it’s about stepping out of your comfort zone, connecting with nature, and making memories with the people you care about. You don’t need fancy gear, perfect plans, or years of experience—you just need curiosity, a willingness to laugh at yourself, and a sense of adventure.
Jake and I left our campsite tired, dirty, and already planning our next trip. We’d survived our first solo camping adventure, and we’d learned that the best parts of camping aren’t the perfect sunsets or the fancy meals—they’re the messy, unplanned moments that feel uniquely yours.
So grab your gear, pick a campground, and hit the road. Trust me, the warmth of a campfire, the sound of birds in the morning, and the quiet joy of being outside will make every mistake worth it.